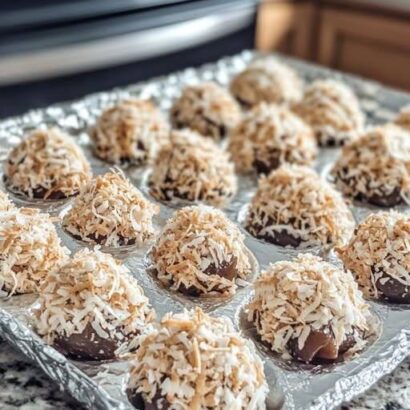
Coconut Butter Bars are the kind of sweet, chewy, golden treats that feel like they came straight from a cozy Southern church bake sale. With a buttery shortbread-style crust and a rich coconut filling that bakes up perfectly caramelized on top, these bars strike the perfect balance between gooey and crisp. They’re easy to make, travel well, and taste even better the next day, making them a favorite for potlucks, parties, holidays, or simple everyday snacking.
Who Are These Bars For?
These Coconut Butter Bars are perfect for:
- Home bakers who want a reliable, quick dessert.
- Coconut lovers who enjoy rich, chewy textures.
- People who need a crowd-pleasing treat for gatherings.
- Anyone craving an old-fashioned, no-fuss recipe with pantry ingredients.
- Busy cooks looking for a dessert that can be made ahead of time.
Why This Recipe Works
These bars are incredibly satisfying because they combine two textures in one bite:
- A buttery, slightly crisp crust made from brown sugar and melted butter.
- A gooey coconut filling that sets into a soft, chewy layer with toasted coconut on top.
Sweetened condensed milk adds creaminess, while the toasted topping gives color and flavor. It’s simple, consistent, and delicious—everything you want in a classic dessert bar.
Ingredients
For the Crust
| Ingredient | Amount |
|---|---|
| Flour | 2 cups |
| Brown sugar (packed) | 1 cup |
| Salt | 1 teaspoon |
| Butter, melted | 1 cup (2 sticks) |
For the Filling
| Ingredient | Amount |
|---|---|
| Flour | 1/2 cup |
| Sweetened condensed milk | 1 (14 oz) can |
| Granulated sugar | 2 tablespoons |
| Eggs | 3 |
| Butter, melted | 1/4 cup |
| Vanilla extract | 2 teaspoons |
| Salt | 1 teaspoon |
| Sweetened shredded coconut | 3 cups + 1 cup for topping |
Step-by-Step Instructions
1. Prepare the Baking Dish
Preheat your oven to 350°F (175°C) and lightly grease a 9×13-inch baking dish. You can also line it with parchment paper for easier removal after baking.
2. Make the Crust
In a medium bowl, combine:
- 2 cups flour
- 1 cup packed brown sugar
- 1 teaspoon salt
- 1 cup melted butter
Stir until the mixture forms a soft dough. Press it firmly and evenly into the bottom of your prepared baking dish. This layer becomes the base of your bars and should be smooth and compact.
Bake the crust for 13–15 minutes, or until lightly golden.
3. Prepare the Filling
While the crust bakes, mix together the filling. In a large bowl, combine:
- 1/2 cup flour
- Sweetened condensed milk
- 2 tbsp sugar
- 3 eggs
- 1/4 cup melted butter
- 2 teaspoons vanilla
- 1 teaspoon salt
- 3 cups shredded coconut
Mix until everything is fully combined. The mixture should be thick and creamy.
4. Assemble & Bake
Pour the filling evenly over the warm crust. Smooth the top with a spatula, then sprinkle the additional 1 cup of shredded coconut over the surface.
Return the dish to the oven and bake for 25–28 minutes, or until:
- the center is set,
- the edges are lightly golden,
- and the coconut on top begins to toast.
5. Cool & Slice
Allow the bars to cool completely in the pan. This helps the filling set and makes slicing much easier. Once cool, cut into squares or rectangles.
Storage Instructions
These bars store extremely well:
- Room temperature: up to 2 days (covered)
- Refrigerator: 5–6 days in an airtight container
- Freezer: up to 2 months
Wrap individual bars tightly in plastic, then place in a freezer bag.
They taste amazing chilled or slightly warmed.
Variations
Try these fun twists:
- Chocolate Drizzle: Add melted chocolate on top after cooling.
- Nutty Crunch: Stir 1/2 cup chopped pecans into the filling.
- Tropical: Add crushed pineapple (well drained) for a piña-colada twist.
- Lemon Coconut Bars: Add 1 tablespoon lemon zest to brighten the flavor.
Frequently Asked Questions (FAQ)
Can I use unsweetened coconut?
Yes, but the bars will be less sweet. Add 2–3 extra tablespoons of sugar to balance it out.
Can I use a different crust?
You can use a graham cracker crust, but the texture will be softer and sweeter. The flour crust gives a classic cookie-bar base.
Do the bars need to be refrigerated?
Not necessarily, but they stay fresher longer when stored in the fridge.
Can I make these ahead for a party?
Yes! They actually taste even better the next day as the flavors settle.
Conclusion
Coconut Butter Bars are the perfect combination of buttery, sweet, chewy, and toasty. Whether you’re serving them for a potluck, tucking them into a dessert tray, or enjoying them with a cup of coffee, they deliver that warm, nostalgic flavor that feels like home. Easy to prepare and impossible to resist, this is one recipe you’ll want to make again and again.